Hey friends! If you’re just getting on the bandwagon for hiding painted rocks in your community, then welcome! It’s so much fun! We can all use a bit of unexpected cheer, and leaving a colorful rock with a pretty design, funny image, or uplifting phrase for someone to find is a simple way to spread love. Which, incidentally, is the theme of today’s rock painting ideas!
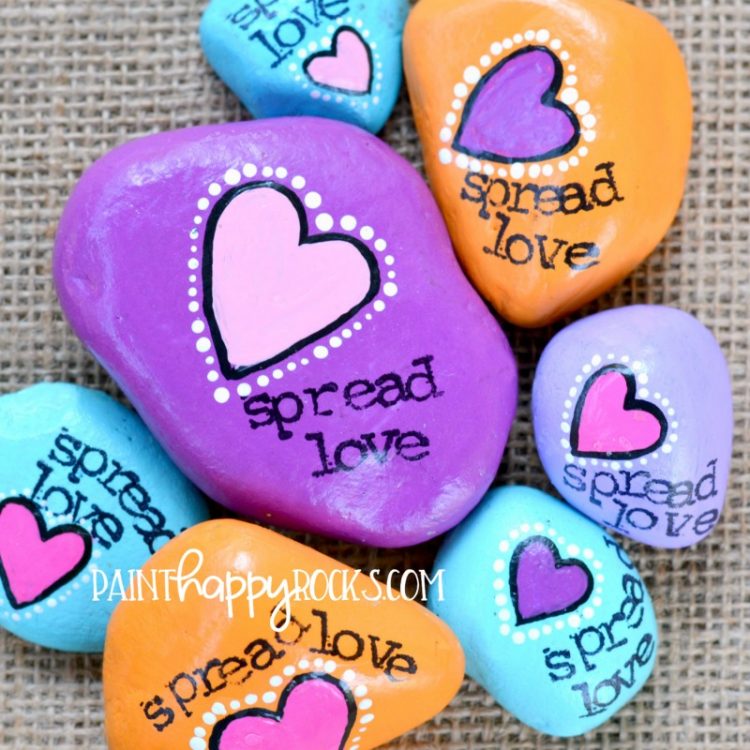
You see, you don’t have to be a great artist to make painted rocks. The simple heart shape on today’s rock painting inspiration is something anyone can do! The key to painting rocks is making sure that they stand up to the elements if you’re going to be hiding them around your community. So today, I’m going to share some tips for getting started with rock painting, including basic supplies and ways to connect with others in your community and beyond.

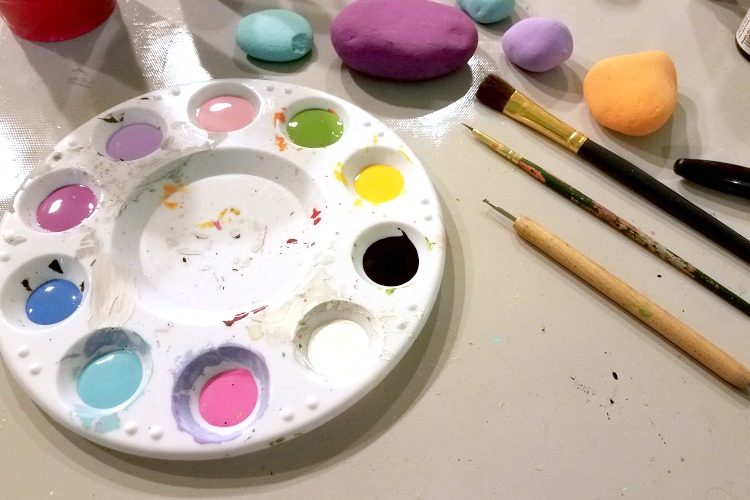
Stock your supply bin with some of these items to get started making painted rocks.
You may click on any of the links in the list below to shop or to learn more! These are affiliate links, meaning I make a small commission at no extra cost to you, which keeps all these projects free! I’ll discuss what to look for when shopping for these items as you read on.
- Rocks!
- Acrylic Paints
- Paintbrushes
- Varnish (I prefer the paint-on type, but spray varnish works fine too)
- Paint Palette
- Gel Pens and/or Permanent Markers
- Mod Podge or Craft Glue
- Stylus
- Stamps and Archival Inks
- Pencil
Rocks.
This goes without saying, right? Well, there are a few things to make note of! Please do not steal rocks from professional landscaping, your neighbor’s yard, etc. Chances are someone has paid to have those lovely rocks put there, so get permission before you take a few. If you can’t find any in your own yard, decorative tumbled river rocks are usually a nice size and shape for painting.
Acrylic Paints.
I have not found any one brand to be much better than others. I recommend picking up a multi-color set, or at least the basics – red, orange, yellow, green, blue, aqua, purple, pink, brown, black, and white.
I prefer to paint my rocks completely, on the front and back. Many people only paint the front, or they allow the natural rock to show as the background and they only paint an image. There is no right or wrong way!
Paintbrushes.
I have 2 favorite brushes for painting that nobody gets to touch! Haha. My #10 flat brush is my go-to for backgrounds and for applying varnish at the end. My #1 round brush (or any fine detail brush, really) is what I primarily use for my designs. These are common sizes, so you shouldn’t have trouble finding a variety pack with both sizes included. You’ll discover you have your own favorites, too!
Pens and Markers.
This goes a little beyond painting, but painting isn’t for everyone. If you’re more into drawing than painting, I’ve had great success with the Sakura Gelly Roll pens. They work best on a painted background, and you can get some fantastic detail using them. They also work well for lettering. If you’re not planning on investing in pens *and* paint, though, at least pick up a Sharpie for adding hashtags to the backside of your rocks! I have also used the Beric Paint Pens and I like them well enough (they definitely work!), but the tip requires a little priming, so the learning curve is a little sharper with the paint pens. For the money, I recommend gel pens for beginners.
Mod Podge or Craft Glue.
This is a necessity if you’re using pens or markers in your designs, because varnish alone will smear that ink. You won’t need to cover paint with a glue-type sealant, but you can protect your lettering and your details by painting on a thin protective layer of glue or Mod Podge (any formula, matte or glossy).
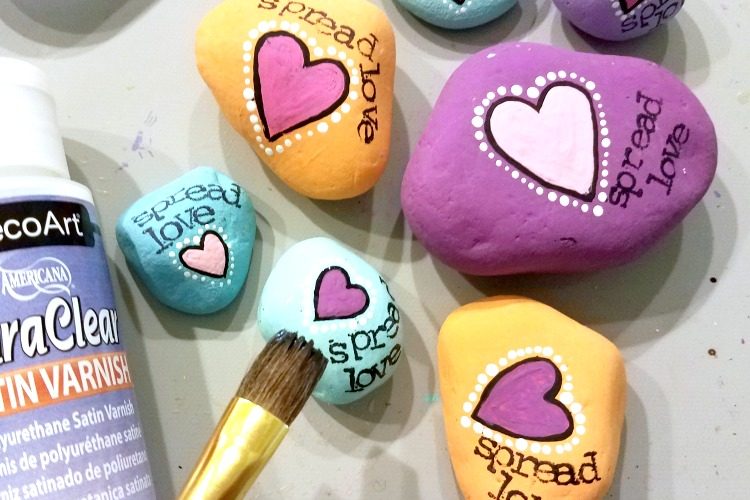
Varnish.
By the time you’re finished and your rock is dry, it’s hard to want to paint it with another coat of anything, but trust me – it is well worth it in the long run! Mod Podge alone is not a heavy enough sealant to withstand the elements and the wear and tear of the elements, pockets and purses, etc. I really prefer the paint-on varnish, because I don’t have to leave my chair to add a coat! Spray varnishes work every bit as well, but since you have to take them outside for ventilation and to protect your work surfaces, I find the paint-on varnishes to be much more practical.
Ball-tip Stylus.
You may find these if you search for clay stylus or embossing stylus. You can also hack your own stylus with things like toothpicks and sewing pins. But these are great for making dots – which may not sound like much, but you might be surprised at the looks you can accomplish with dots! They can set off your own simple shapes (like these hearts!), they can be used in Mandala designs, they’re great for florals and polka dots – it’s such an inexpensive tool for all the times I end up using mine.

Pencil.
This sounds like a no-brainer, but I can’t tell you how many times that sketching out a basic outline on my rock has helped me to leave room for phrases, to center designs, or to make my mistakes before I begin to paint. If you’re using an existing design as inspiration, you may also find it helpful to sketch it on the rock first to make sure you have your proportions and shapes right. Pencil is really only useful on painted backgrounds – the matte surface of dry acrylic paint is ideal.
Stamps and Inks.
This is my outside-the-box contribution, only because the classic typewriter stamps have become part of my signature style. Should you choose to use stamps in your designs, be sure to sue an archival-quality ink along with them. It will not smear or fade, and you can use varnish directly on Ranger Archival Inks (and most likely other brands as well! I just happen to be a Ranger kind of gal).

There are many other methods and ideas as well, and if you’re inclined to – get creative!! I’m just sharing what has worked well for me personally over the past 200+ rocks I’ve painted since becoming a bit obsessed with painted rocks. My style is a bit cartoonish, with the focus on a word or short phrase stamped in typewriter-style lettering. It’s not hard to identify one of my rocks within my small community! You may be into fine art, pop culture, or any of the MANY other styles that these tiny natural canvases provide.
Getting Involved.
Now, what do you do with all these rocks once you’ve painted them? Well, it’s up to you, but I say, share them! First, check to see if there’s a rock painting community in your area on Facebook. Every state has at least one group, and within your area, there may even be a group for your city. (If there’s not, consider starting one!) Search for your city or state’s name + the word “rocks” and see what pops up!

I belong to groups in my city, metro area, and state. You can also join the community at #PaintHappy! It’s a great place to share rocks you have painted or found, and painters of every skill level are welcome.
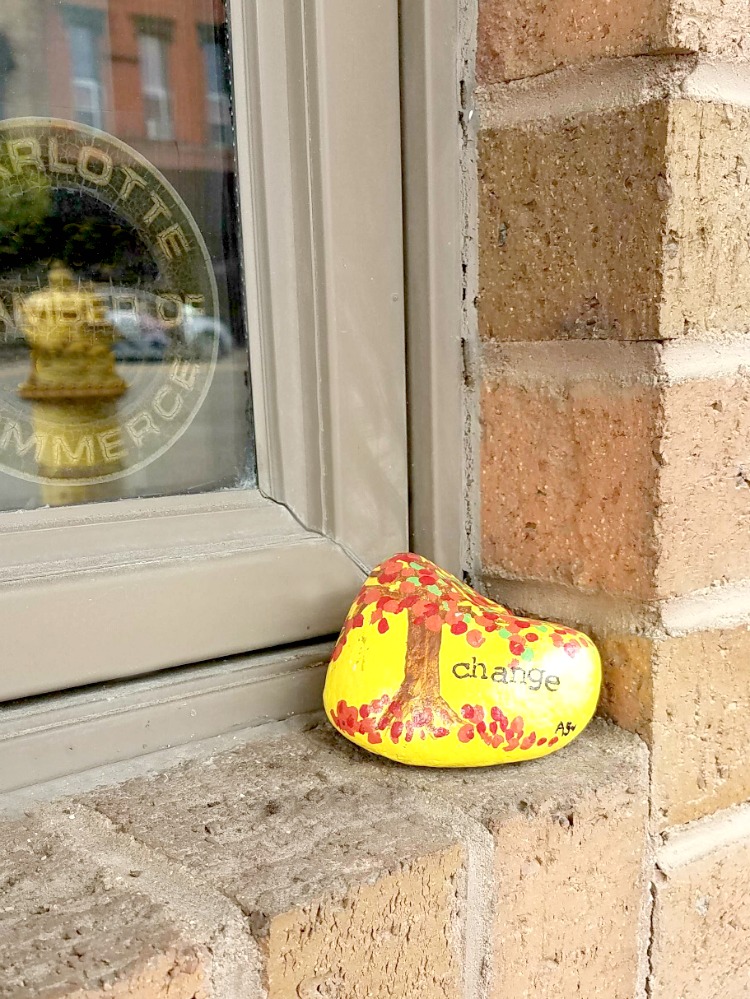
Get out for a walk in your community areas and take a look. Downtown areas and neighborhood parks are great places to find and hide painted rocks. Please be aware of any laws or ordinances in the area where you may be planning to leave a rock – national parks and other rugged areas have a “leave no trace” policy. In places like these you should not remove nor leave rocks. If you visit an amazing place with this policy, consider hiding a rock at a nearby restaurant, rest stop, or other community area.
Hashtags.
Finally, a note about any hashtags that may be on the backsides of the rocks you find, or you may want to add to the ones you paint. Hashtags like #PaintHappy will lead a finder to the Paint Happy Rocks community. I’d be thrilled if you add it to the backside of your rocks.
Whether you add the hashtag or not, you’re still welcome to share in the group, or in your own local community group! When you find a rock, please try to include any hashtags on the back of the rock, so that the original artist can find it and feel good about their piece of art making its way around the city, the county, or even the country.

That about wraps up what I have to share about rock painting as it stands a s a trend these days. Be on the lookout for more tutorials and inspiration right here at PaintHappyRocks.com!

Maggie says
Wonderful tips and ideas love love love it